Every gamer knows the frustration of lagging or stuttering gameplay, which can disrupt the flow and excitement of a game. One key factor that significantly impacts gaming performance is the amount of RAM (Random Access Memory) in your laptop. RAM plays a vital role in determining how smoothly your games run, as it temporarily stores and quickly accesses the data your system needs to perform tasks efficiently. how to add more ram to gaming laptop.
Assessing the Need for More RAM
Signs Your Laptop Needs More RAM
If you’re a gamer, you know that seamless performance is crucial for an immersive experience. One of the most common signs that your gaming laptop needs more RAM is slow game load times. When launching a game, you might notice it takes longer than usual to start, indicating that your current RAM isn’t sufficient to handle the game’s requirements efficiently. Another telltale sign is frequent stuttering or lag during gameplay. This can be incredibly frustrating, especially in fast-paced games where split-second reactions are vital. If you find your games are often pausing or freezing, it’s likely due to inadequate RAM.
Moreover, if you’re trying to run multiple applications simultaneously, such as streaming software, web browsers, and gaming clients, and you notice your laptop struggling to keep up, it’s a clear indication that your system is running low on RAM. The inability to switch smoothly between applications or experiencing delays can significantly impact your gaming and overall productivity. Upgrading your RAM can help alleviate these issues by providing more memory for your laptop to use, resulting in smoother and faster performance.
Checking Current RAM Usage
Before deciding to upgrade, it’s essential to check your current RAM usage to understand if you truly need more. For Windows users, this can be done by opening the Task Manager. Simply press Ctrl + Shift + Esc, and navigate to the Performance tab to see a detailed view of your memory usage. Mac users can achieve the same by opening the Activity Monitor through Spotlight search and clicking on the Memory tab. Here, you’ll be able to see how much RAM is being used and how much is available.
To ensure optimal performance for modern games, it’s recommended to have at least 16GB of RAM. However, some high-end games and multitasking scenarios might benefit from 32GB or more. By assessing your current RAM usage and understanding your gaming requirements, you can make an informed decision on whether adding more RAM to your gaming laptop is necessary.
Preparing for the Upgrade
Researching Compatibility
Before you embark on your DIY laptop RAM upgrade, the first crucial step is researching the compatibility of your laptop with the new RAM. This involves identifying the type of RAM your gaming laptop supports. Most modern gaming laptops use DDR4 RAM, while some newer models may support DDR5. It’s essential to refer to your laptop’s manual or the manufacturer’s website to confirm the specific RAM type.
Understanding RAM speed and capacity limits is equally important. RAM speed, measured in MHz, affects how quickly data can be read or written. Higher speeds can enhance gaming performance, but your laptop’s motherboard must support these speeds. Additionally, laptops have a maximum RAM capacity they can handle, often determined by the number of available slots and the maximum memory per slot. For example, a laptop with two slots might support up to 32GB of RAM, with each slot accommodating up to 16GB.
Consulting manufacturer recommendations and specifications ensures that the RAM you choose is compatible with your gaming laptop. Manufacturers typically provide a list of supported RAM modules, making it easier to select the right product. This step prevents potential issues such as your laptop not recognizing the new RAM or system instability after installation.
Gathering Tools and Materials
Once you’ve confirmed the type of RAM compatible with your laptop, the next step is gathering the necessary tools and materials for the upgrade. A straightforward laptop RAM installation requires a few basic tools. A small Phillips-head screwdriver is essential for removing the screws from the laptop casing. An anti-static wrist strap is highly recommended to prevent static electricity from damaging sensitive components during the upgrade.
Finding the right RAM is critical for a successful upgrade. Pay attention to reputable brands known for quality and reliability, such as Corsair, Kingston, or Crucial. Consider the capacity and speed that best match your gaming needs and budget. For instance, if you’re upgrading to improve gaming performance, 16GB to 32GB of high-speed RAM (e.g., 3200MHz) can significantly enhance your laptop’s capabilities.
Backing Up Your Data
Before you begin the physical process of adding RAM to your gaming laptop, it’s imperative to back up your data. Hardware changes can sometimes lead to unforeseen issues, and having a backup ensures that your valuable data is safe. There are several methods to back up your data effectively.
One common method is using an external drive. This involves copying your important files, such as documents, photos, and game saves, to an external hard drive or SSD. This method is straightforward and provides a physical backup that can be easily stored and accessed. Alternatively, cloud storage solutions like Google Drive, Dropbox, or OneDrive offer the convenience of backing up data online. This method is particularly useful if you have a stable internet connection and prefer not to use physical storage devices.
Backing up your data not only safeguards against potential data loss during the RAM upgrade but also provides peace of mind. Once your data is securely backed up, you can proceed with the RAM installation process without worrying about accidental data loss.
By carefully researching compatibility, gathering the right tools and materials, and backing up your data, you lay a solid foundation for a smooth and successful RAM upgrade. These preparatory steps are essential to ensure that the upgrade process is efficient, effective, and free from complications.

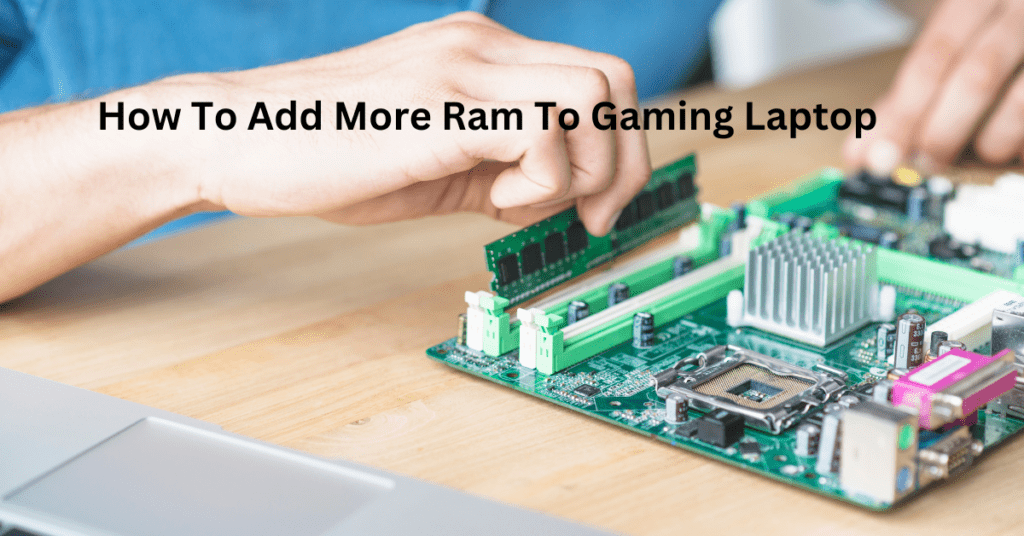
Step-by-Step Guide to Adding More RAM to Your Gaming Laptop
Upgrading the RAM in your gaming laptop can significantly improve its performance, allowing for smoother gameplay and better multitasking capabilities. Follow this step-by-step guide to add more RAM to your gaming laptop effectively and safely.
Powering Down and Safety Precautions
Before you begin, it’s crucial to ensure your laptop is completely powered down. Shut down the laptop through the operating system and wait until it is fully turned off. Disconnect all cables and external devices, including the power adapter, USB devices, and any other peripherals. This step is essential to avoid any electrical hazards and to prevent damage to your laptop components.
Next, to protect your laptop’s internal components from static electricity, it’s recommended to use an anti-static wrist strap. This wrist strap will help ground you and prevent static discharge, which can harm sensitive electronic parts. Attach the wrist strap to your wrist and connect the other end to a grounded metal object.
Opening the Laptop
Once you’ve taken the necessary safety precautions, it’s time to open your laptop. Start by locating the screws that secure the bottom panel of your laptop. These screws are typically found around the perimeter of the panel. Using an appropriate screwdriver, carefully remove each screw and place them in a safe location where they won’t get lost.
With the screws removed, gently pry open the bottom panel. Some laptops may have clips that hold the panel in place, so be careful not to force it open. Use a plastic pry tool if needed to avoid scratching or damaging the casing. Slowly lift the panel away from the laptop, exposing the internal components.
Identifying the RAM Slots
With the bottom panel removed, you can now identify the RAM slots. Look for the existing RAM modules, which are usually located near the center of the motherboard. The RAM slots are long and rectangular, with small notches that guide the installation of the RAM modules. Depending on your laptop model, there may be one or more RAM slots available.
Identify whether there are any empty slots or if you need to replace existing RAM modules. If all slots are occupied, you’ll need to remove one or more existing modules to install the new RAM. Note the position and orientation of the notches on the existing RAM, as this will help you correctly align the new modules.
Installing the New RAM
If you need to remove existing RAM, gently push the metal clips on either side of the RAM module outward. The module should pop up at an angle, allowing you to carefully pull it out of the slot. Set the removed RAM aside.
Now, take your new RAM modules and align the notches with the corresponding guides in the RAM slots. Insert the RAM at an angle and then press down firmly until the metal clips snap into place, securing the module. Ensure that the RAM is seated evenly and that the clips are fully engaged.
Repeat this process for each RAM module you’re installing. Double-check that all modules are securely in place before proceeding.
Reassembling the Laptop
After successfully installing the new RAM, it’s time to reassemble your laptop. Carefully place the bottom panel back onto the laptop, ensuring it fits snugly and that no internal components are being pinched or misaligned. Replace the screws you removed earlier, tightening them securely but not excessively to avoid stripping the screw heads or damaging the threads.
Once the bottom panel is securely in place, reconnect any cables and external devices you previously disconnected. Double-check that everything is properly connected and that there are no loose components.
Powering On and Verifying the Upgrade
With your laptop reassembled, it’s time to power it on and verify that the RAM upgrade was successful. Press the power button and allow the laptop to boot up. If the laptop fails to start or you encounter any errors, power it down immediately and recheck your installation steps to ensure the RAM modules are correctly installed.
Assuming the laptop boots up successfully, the next step is to check the BIOS/UEFI settings. Access the BIOS/UEFI by pressing the appropriate key during startup (commonly F2, F10, or Del, depending on your laptop manufacturer). Navigate to the system information section to verify that the BIOS/UEFI recognizes the new RAM. The total RAM capacity should reflect the addition of the new modules.
After confirming that the BIOS/UEFI recognizes the new RAM, proceed to verify it within the operating system. For Windows users, right-click on the Start button and select “System” from the context menu. Under the “Device specifications” section, you should see the total installed RAM. Mac users can click on the Apple menu, select “About This Mac,” and check the “Memory” section to see the total RAM capacity.
Post-Upgrade Tips and Troubleshooting
Once you’ve successfully upgraded your gaming laptop’s RAM, optimizing its performance and addressing any issues that arise are essential steps to ensure you get the most out of your investment. Here are some tips and troubleshooting advice to help you along the way.
Optimizing RAM Performance: After installing new RAM, adjusting your system settings can enhance RAM utilization. Begin by ensuring your laptop’s BIOS or UEFI firmware is updated to the latest version, as manufacturers often release updates that improve hardware compatibility and performance. Within your operating system, you can tweak settings to optimize performance. For instance, on Windows, you can adjust the virtual memory settings to complement your physical RAM. Disable unnecessary startup programs and services to free up more RAM for your games. Regularly cleaning your system of temporary files and defragmenting your hard drive (if you’re not using an SSD) can also contribute to maintaining optimal performance.
Troubleshooting Common Issues: Sometimes, even after a seemingly successful RAM upgrade, your laptop might not recognize the new memory. If this occurs, start by ensuring the RAM modules are seated correctly in their slots. Power down the laptop, open the casing, and gently press down on each module until you hear a click. If the issue persists, check the BIOS/UEFI settings to see if the new RAM is detected there. Another common issue is system instability or crashes post-upgrade. This could be due to incompatibility between the new RAM and existing hardware.
Ensure that the RAM modules match the specifications required by your laptop. If mismatched RAM speeds or capacities are causing problems, consider using identical RAM modules. Running a memory diagnostic tool can also help identify faulty RAM. If errors are found, you may need to replace the defective module.
When to Seek Professional Help: While DIY RAM upgrades are generally straightforward, there are times when professional help is warranted. If your laptop continues to experience issues despite troubleshooting, or if you are uncomfortable with opening your laptop, it’s best to consult with a professional. Recognizing complex problems, such as motherboard compatibility issues or deeper hardware malfunctions, often requires expert knowledge. To find reliable tech support, look for certified technicians or authorized service centers for your laptop brand. Online forums and communities can also provide recommendations for trustworthy local services. Remember, investing in professional assistance can save you time and prevent potential damage to your laptop.
Conclusion
Adding more RAM to your gaming laptop can significantly enhance your gaming experience by boosting performance and reducing lag. By following the step-by-step guide provided, you can confidently assess your laptop’s RAM needs, prepare for the upgrade, and successfully install the new RAM. We covered essential steps, such as checking your current RAM usage, researching compatible RAM, and gathering the necessary tools. Additionally, we walked through the process of safely opening your laptop, identifying the RAM slots, and correctly installing the new RAM modules. Finally, we discussed post-upgrade tips to optimize RAM performance and troubleshoot any common issues that may arise.
Upgrading your gaming laptop’s RAM might seem daunting at first, but it’s a feasible DIY project that offers substantial benefits. Not only will you experience smoother gameplay, but you’ll also extend the lifespan and usability of your laptop. By taking the initiative to upgrade your RAM, you’re taking control of your gaming setup and ensuring it meets the demands of modern games. Remember, the key to a successful upgrade is thorough preparation and careful execution, both of which we’ve detailed in this guide.
We encourage you to share your experiences and any questions you might have in the comments section below. Your insights could help fellow gamers who are considering a similar upgrade. Additionally, if you found this guide helpful, please share it with others who might benefit from learning how to upgrade their gaming laptop RAM. Whether they’re dealing with lagging gameplay or simply want to enhance their system’s performance, this guide can provide the knowledge and confidence needed to make the upgrade.
Frequently Asked Questions (FAQ): how to add more ram to gaming laptop
1. How do I know if my gaming laptop needs more RAM?
You may need more RAM if you experience slow game load times, frequent stuttering or lag during gameplay, or if your laptop struggles to run multiple applications smoothly. You can also check your current RAM usage using Task Manager (Windows) or Activity Monitor (Mac) to see if you frequently reach or exceed your laptop’s RAM capacity.
2. What type of RAM is compatible with my gaming laptop?
To find out what type of RAM is compatible with your laptop, check your laptop’s user manual or the manufacturer’s website for specifications. Look for details such as the type (e.g., DDR4, DDR5), speed, and maximum capacity supported. There are also online tools and databases where you can enter your laptop model to find compatible RAM options.
3. Is it difficult to add RAM to a gaming laptop?
Adding RAM to a gaming laptop is generally a straightforward process if you follow detailed instructions and take necessary precautions. While the steps involve opening your laptop and handling sensitive components, with proper preparation and care, most people can successfully complete the upgrade. Using an anti-static wrist strap and carefully following a step-by-step guide can help ensure a smooth installation.
4. Will upgrading RAM void my laptop’s warranty?
This depends on your laptop’s manufacturer and warranty terms. Some manufacturers allow RAM upgrades without voiding the warranty, while others might have restrictions. It’s best to check your warranty documentation or contact the manufacturer to understand their specific policies regarding hardware upgrades.
5. What should I do if my laptop doesn’t recognize the new RAM?
If your laptop doesn’t recognize the new RAM, first ensure that the RAM modules are properly seated in the slots. You might need to remove and reinsert them to ensure a secure connection. Check the BIOS/UEFI settings to see if the RAM is detected there. If issues persist, verify that the RAM is compatible with your laptop and consider consulting with a professional technician or the RAM manufacturer’s support team for further assistance.