A clean gaming keyboard is essential not only for maintaining hygiene but also for ensuring optimal performance during intense gaming sessions. Over time, dust, dirt, and oil from your hands can accumulate on the keys, affecting the responsiveness and comfort of your keyboard. Regular cleaning and maintenance can help extend the life of your gaming keyboard, keeping it in top shape for longer. By removing debris, cleaning key switches, and taking care of minor issues before they become major problems, you can ensure your keyboard remains efficient and responsive, offering a smooth gaming experience. Clean and Maintain Your Gaming Keyboard
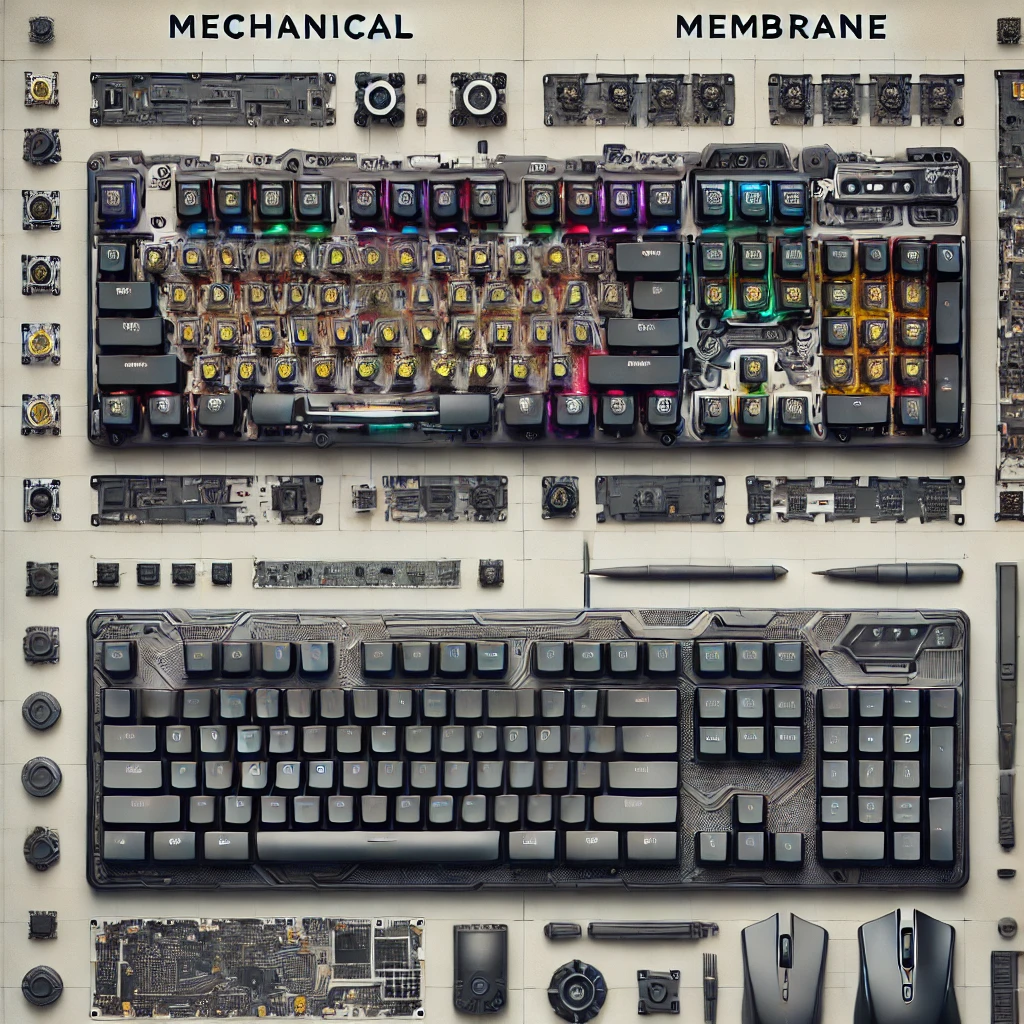
Proper maintenance can also enhance the performance of your gaming keyboard. For instance, cleaning the switches and keycaps can prevent sticky or unresponsive keys, while regular upkeep of internal components ensures optimal key response time. Whether you use a mechanical keyboard known for its tactile switches or a membrane keyboard with a quieter feel, each type requires specific cleaning techniques to avoid damage and maintain their unique characteristics. Regardless of the type, keeping your keyboard clean is crucial for both aesthetics and performance.
In this guide, we’ll walk you through the best practices for cleaning and maintaining your gaming keyboard, ensuring your setup stays pristine and ready for action.
Why Regular Cleaning and Maintenance Is Essential
A gaming keyboard is an essential tool for any gamer, but its performance can suffer over time if not properly cleaned and maintained. Regular cleaning helps prevent the buildup of dirt, dust, and grime that can negatively impact key response and overall comfort. Dirt and debris can get trapped under the keys, causing them to feel sticky or unresponsive, which can be particularly frustrating during intense gaming sessions. Regular maintenance ensures your keyboard remains responsive, allowing you to have the best gaming experience without interruptions.
One of the main reasons to clean and maintain your gaming keyboard is to prevent wear and tear on the keys and switches. With consistent use, dust and oils from your fingers can accumulate on the keycaps, causing the labels to fade and making them more difficult to press. For mechanical keyboards, grime can work its way into the switches, leading to performance issues like unregistered keystrokes. By cleaning your keyboard regularly, you can help preserve its appearance and functionality, reducing the need for repairs or replacements.
Another important aspect of keyboard cleaning is maintaining hygiene. Our hands naturally carry oils, sweat, and bacteria, which can transfer onto the keys. Over time, this buildup can lead to unpleasant odors, or worse, the growth of bacteria and allergens. Regularly wiping down your keyboard with a microfiber cloth and isopropyl alcohol helps to keep it sanitary, which is especially important if you spend long hours gaming or working. Keeping your gaming keyboard clean not only improves its performance but also ensures a healthier, more pleasant environment for your hands and fingers.
By incorporating regular cleaning into your routine, you’ll keep your gaming keyboard in top condition, ensuring optimal performance and hygiene for the long term.
Tools You’ll Need for Cleaning and Maintenance
To properly clean and maintain your gaming keyboard, you’ll need a few basic tools to ensure the job is done effectively without damaging your equipment. Here’s a list of essential and optional tools that will make the process easier:
Basic Tools:
1. Compressed Air or Air Blower
A can of compressed air or an air blower is essential for blowing out dust, crumbs, and other debris from between the keys. It helps reach those hard-to-clean areas without disassembling your keyboard, making it an easy first step for a quick clean.
2. Microfiber Cloth
A microfiber cloth is perfect for wiping down the surface of your keyboard without leaving lint or scratches. It’s gentle on the keys and highly effective for removing fingerprints, dust, and oils from frequent use.
3. Isopropyl Alcohol (70% or higher)
Isopropyl alcohol is a key cleaning agent that disinfects and evaporates quickly without leaving any residue. It’s ideal for sanitizing the keys and cleaning the keyboard’s surface, especially for mechanical keyboards with sensitive switches.
4. Cotton Swabs
Cotton swabs are useful for cleaning the nooks and crannies around the keys and switches. They allow you to apply alcohol in small, controlled amounts to target specific areas, such as between keycaps or around switch housings.
5. Keycap Puller (If Necessary)
If you’re doing a deeper clean or want to replace your keycaps, a keycap puller is essential. This tool allows you to safely remove keycaps without damaging the switches underneath, ensuring that you can clean the keys thoroughly.
6. Soft Brush (Optional)
A soft brush, like a paintbrush or a small cleaning brush, can help sweep away dust and debris from the keyboard’s surface and internal components, especially in mechanical keyboards.
Optional Tools:
1. Cleaning Gel or Putty
Cleaning gel or putty is a great option for picking up dirt, dust, and other debris from hard-to-reach areas, like between keycaps and around the keyboard edges.
2. Keyboard-Specific Cleaning Kits
Some brands offer keyboard-specific cleaning kits that include a combination of tools like brushes, wipes, and keycap pullers, all designed for optimal maintenance and care.
With these tools, you’ll be ready to give your gaming keyboard the care it needs to stay in top condition.
How to Safely Clean Your Gaming Keyboard
3.1 Preparing Your Keyboard
Before you begin cleaning your gaming keyboard, it’s crucial to disconnect it from your computer to avoid any electrical issues or accidental key presses. If you have a USB gaming keyboard, simply unplug it. For Bluetooth or wireless keyboards, ensure the device is powered off or disconnected from your system.
If your keyboard has removable keycaps, it’s a good idea to gently remove them before cleaning. This will allow you to access the dirt and debris that can accumulate underneath. Use a keycap puller to avoid damaging the switches or the keycaps themselves.
3.2 Cleaning the Keycaps
Mechanical Keyboards:
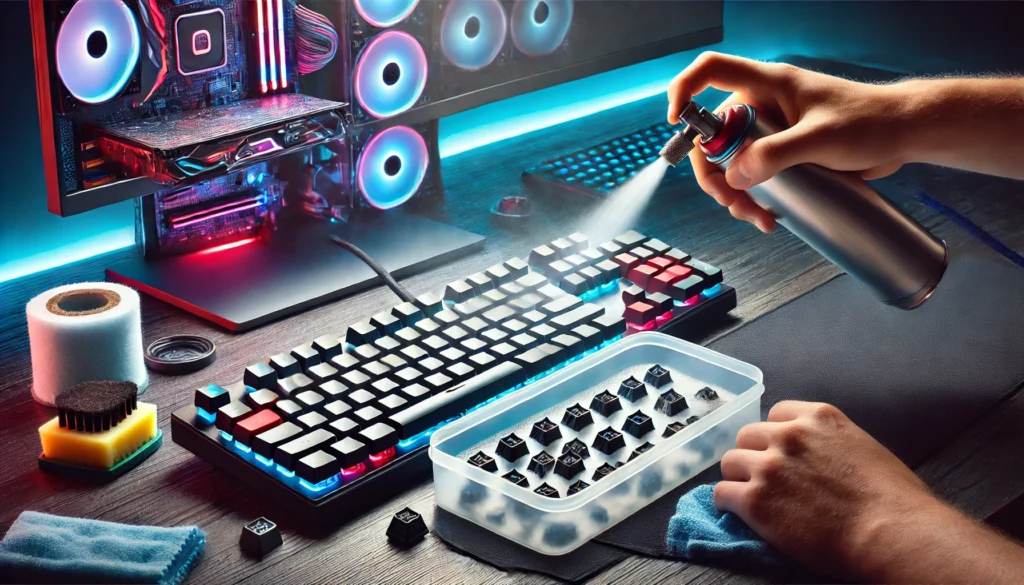
For mechanical keyboards, carefully remove the keycaps using a keycap puller. Once removed, soak the keycaps in warm, soapy water for about 15-20 minutes. This helps loosen any grime or oil buildup. After soaking, dry the keycaps thoroughly with a soft cloth or let them air dry to prevent moisture from damaging the keyboard.
Membrane Keyboards:
For membrane keyboards where the keycaps aren’t easily removed, use a damp cloth or specialized cleaning gel to wipe down the keycaps. Be sure not to use excessive water, as this could seep into the internal components. The cleaning gel works well for picking up dust and dirt from non-removable keys.
3.3 Cleaning the Keyboard Surface
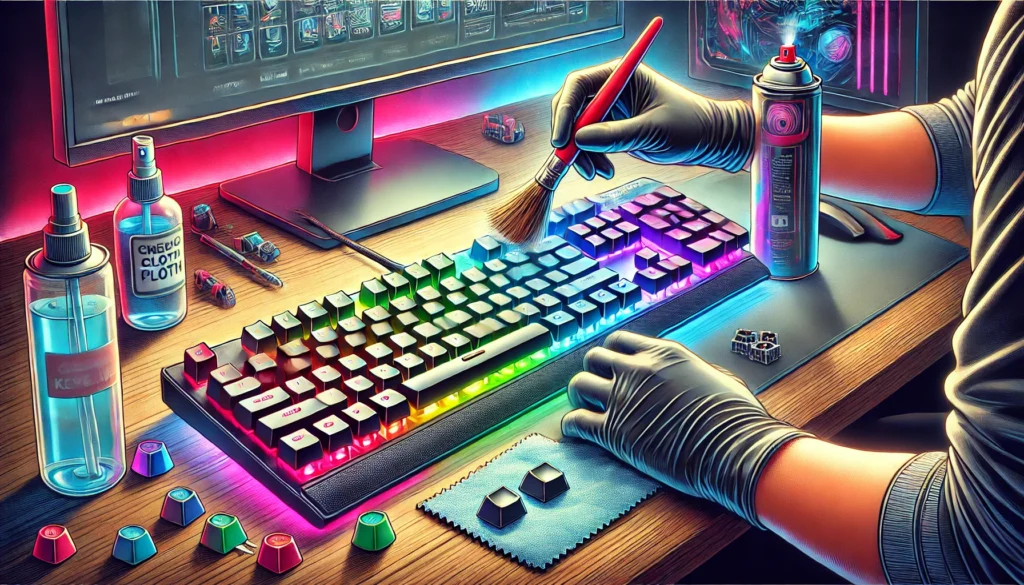
Use a microfiber cloth and a small amount of isopropyl alcohol (70% or higher) to gently clean the keyboard’s surface and the spaces between the keys. The alcohol will remove oils and grime without damaging the finish of your keys. Be sure to clean both the top and sides of the keys to ensure thorough cleaning.
Additionally, use compressed air to blow out any dust and debris from between the keys. This is a great way to clean hard-to-reach areas without disassembling the keyboard.
3.4 Cleaning the Inside of the Keyboard (Optional)
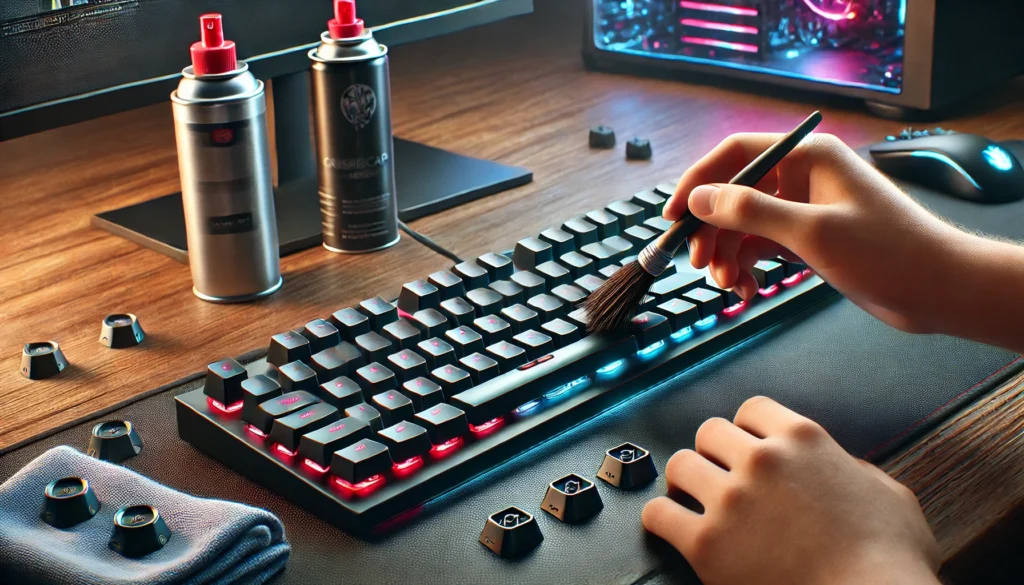
If you want to perform a deeper clean, you can open your keyboard (if it’s designed for disassembly). Use a soft brush to gently remove dust and debris from the internal components, such as the switches and circuit board. Be cautious not to damage any delicate parts during this process.
This section provides a comprehensive, step-by-step guide to cleaning and maintaining your gaming keyboard safely. Let me know if you’d like to refine any part of it or add more details!
Maintaining Your Gaming Keyboard for Longevity
4.1 Preventing Dirt Build-up
One of the best ways to keep your gaming keyboard in top condition is by maintaining a clean desk environment. A tidy workspace will reduce the amount of dust and debris that can make its way into the gaps between your keys. Regularly wipe down your desk and keyboard surface to avoid the accumulation of dirt.
Consider using a keyboard cover or case to shield your keyboard from dust and spills when it’s not in use. These protective accessories are especially helpful for keeping your keys clean and free from contaminants. A cover can be quickly removed and washed, making it easier to maintain cleanliness over time.
Also, be mindful of food and drinks around your keyboard. Keeping food and drinks away from the keyboard not only prevents crumbs and spills from entering your keyboard but also protects against accidental damage, which could cause your keys to become sticky or unresponsive. By forming these habits, you’ll significantly reduce the need for frequent cleaning.
4.2 Lubing the Switches (For Mechanical Keyboards)
For mechanical keyboards, lubing the switches can improve key feel and reduce friction, leading to smoother key presses. Lubing switches should be done every 6-12 months, depending on usage. It’s a great way to keep your keyboard in optimal condition and enhance your gaming experience.
To apply lubricant, you’ll need to disassemble the keyboard and remove the keycaps. Once the switches are exposed, use a fine brush to apply the lubricant to each switch. The process can be time-consuming, but it’s highly effective for improving the tactile feel and noise levels. Best types of lubricants include Krytox or Tribosys, as these products are specifically designed for mechanical keyboards and ensure long-lasting smoothness.
4.3 Adjusting Key Sensitivity and Keycaps (If Needed)
If you’re looking to further personalize your gaming experience, adjusting key sensitivity or replacing your keycaps might be a good idea. Mechanical switches offer different actuation points, so finding the right feel for your style of play can be crucial.
When choosing replacement keycaps, make sure they are compatible with your switches. Keycaps come in various materials like ABS and PBT, each offering a different tactile experience and durability. Opt for keycaps that match your aesthetic preferences while ensuring they provide the best performance for your gameplay.
This section provides useful maintenance tips while naturally incorporating primary and secondary keywords to help with SEO. Let me know if you’d like to tweak anything!
Troubleshooting Common Issues
When it comes to gaming keyboards, maintaining peak performance means addressing common issues like sticky keys, unresponsive keys, and key fade. Here’s how to troubleshoot these problems effectively:
Sticky Keys: Possible Causes and Solutions
Sticky keys are often caused by dirt, dust, or even spilled liquids that accumulate around the key mechanism. To fix sticky keys, start by gently removing the keycap using a keycap puller. Once the keycap is off, use compressed air to blow away any debris. You can also dip a cotton swab in isopropyl alcohol and gently clean around the switch. If the problem persists, consider cleaning the entire keyboard, ensuring that no grime is blocking the switches.
Unresponsive Keys: How to Check for Dirt or Damage
Unresponsive keys are a common issue that can stem from dirt or damage. First, check for any visible debris between the keycaps. If dirt is the culprit, use compressed air or a soft brush to dislodge the particles. For a more thorough cleaning, remove the keycaps and wipe the switches and surrounding areas with a microfiber cloth dampened with isopropyl alcohol. If the issue continues, inspect the cable or wireless connection for any signs of damage or interference.
Key Fade: Tips on Avoiding Keycap Wear and Tear
Key fade happens when the text on your keycaps begins to wear off due to frequent use. This is especially common in gaming keyboards where certain keys are pressed repeatedly. To avoid key fade, consider investing in keycaps with UV coating or double-shot injection molding, which provide better durability. Additionally, using keycap protectors or a keyboard cover when not in use can help prevent unnecessary wear and tear on the keycaps. Regular cleaning also prevents buildup, which can contribute to faster keycap deterioration.
By addressing these common issues and implementing proper maintenance techniques, you can keep your gaming keyboard in optimal condition for longer.
How Often Should You Clean Your Gaming Keyboard?
Keeping your gaming keyboard clean is essential for optimal performance and longevity. However, it’s not just about cleaning it once and forgetting about it. Regular maintenance helps prevent buildup and ensures your keyboard continues to work like new. Here’s a guide on how often you should clean your gaming keyboard.
Recommended Cleaning Schedule for Regular Maintenance
For light cleaning, it’s a good idea to clean your keyboard every 1-2 weeks. This can involve quickly wiping down the surface with a microfiber cloth, removing dust with compressed air, and cleaning any sticky spots with a cotton swab dipped in isopropyl alcohol. This helps maintain hygiene and ensures the keys remain responsive.
Frequency of Deep Cleaning vs. Light Cleaning
While light cleaning can be done frequently, a deep cleaning should be reserved for every 3-6 months, depending on your usage. Deep cleaning involves removing the keycaps (if applicable), cleaning individual keys, and using a brush or compressed air to clean inside the keyboard. This is particularly important for mechanical keyboards, where dust and debris can get into the switches. Light cleaning, on the other hand, is more about wiping down the surface and preventing dust buildup.
Signs Your Keyboard Needs a More Thorough Clean
There are a few telltale signs that your keyboard needs a more thorough clean. If keys start sticking, losing responsiveness, or making unusual sounds when pressed, it’s time for a deeper cleaning. Additionally, if you notice a buildup of grime or debris between the keys, a deep clean will help restore its performance. If your keyboard has been exposed to food, liquid, or heavy use, it’s a good idea to clean it more thoroughly to avoid long-term damage.
By following these cleaning schedules and being proactive, you can ensure your gaming keyboard remains in top condition for years to come.
Preventing Future Damage: Best Practices for Keyboard Care
Proper care and preventive measures can greatly extend the lifespan of your gaming keyboard. By adopting simple habits, you can minimize damage and keep your keyboard performing optimally.
Setting Up a Proper Workspace to Reduce Dust Accumulation
One of the most effective ways to prevent dust and dirt buildup is by setting up a clean and organized workspace. Place your keyboard in a dust-free area, away from open windows or vents that can blow dust onto your device. Consider using a keyboard cover when you’re not using it to keep dust from accumulating between the keys. Regularly wipe down the surface of your desk or gaming setup to reduce the chances of particles settling on your keyboard.
Regularly Checking for Performance Issues
Maintaining your gaming keyboard goes beyond cleaning—it also involves keeping an eye on its performance. Regularly check for any signs of wear, such as unresponsive or sticky keys, which may indicate that dust or grime has built up inside. If you notice issues like delayed keystrokes or non-functioning keys, it’s best to clean the keyboard thoroughly. Sometimes, simply removing the keycaps and using compressed air to clear out any dust can restore the keyboard’s performance.
Using a Mouse Pad or Desk Mat to Reduce Debris Exposure
A mouse pad or desk mat is more than just a surface for your mouse—it also helps protect your keyboard from debris. By covering your desk with a mat, you create a barrier that catches dust, dirt, and crumbs, preventing them from getting into the spaces between your keyboard’s keys. This simple step will save you time on cleaning and protect the sensitive areas of your keyboard.
By implementing these best practices for keyboard care, you can reduce the chances of damage and keep your gaming keyboard performing at its best. Regular maintenance combined with a clean workspace will ensure that your keyboard lasts longer, giving you a better gaming experience.
Conclusion
Cleaning and maintaining your gaming keyboard is crucial for ensuring both its longevity and optimal performance. Regular cleaning removes dust, dirt, and grime that can affect key response and comfort, helping you maintain a seamless gaming experience. By following a cleaning routine, you not only keep your keyboard looking great but also prevent the buildup of harmful substances that could lead to sticky keys or unresponsiveness.
To extend the lifespan of your gaming keyboard, make sure to clean it regularly, ideally every 1-2 months, and perform deeper cleans every 3-6 months, especially for mechanical keyboards. Using compressed air to blow out dust, wiping down the keys with a microfiber cloth, and removing keycaps for a more thorough clean will go a long way in preserving your keyboard’s performance.
Additionally, avoid eating or drinking near your keyboard, and consider using a protective cover to reduce dirt accumulation. Regularly checking for any performance issues, like unresponsive or sticky keys, will ensure you catch any problems early.
By maintaining your keyboard, you’re not only improving its lifespan but also enhancing your overall gaming experience. Keep these cleaning and care tips in mind, and your gaming setup will be in top shape for years to come.
FAQs for Clean and Maintain Your Gaming Keyboard
1. How often should I clean my gaming keyboard?
It’s recommended to clean your gaming keyboard every 1-2 months, depending on usage. For light cleaning, wiping down the surface and using compressed air can be done more frequently, while a deep clean (including keycap removal) should be done every 3-6 months.
2. Can I use water to clean my gaming keyboard?
It’s best to avoid using water directly on your gaming keyboard, especially on mechanical switches. However, you can dampen a microfiber cloth with a small amount of water or use a cleaning gel for membrane keyboards. Be sure to dry any parts thoroughly after cleaning.
3. What’s the best way to clean mechanical keyboard switches?
To clean mechanical keyboard switches, use compressed air to blow out dust and debris. If you’re doing a deep clean, you may need to remove the keycaps and use a soft brush or cotton swab dipped in isopropyl alcohol to gently clean around the switches.
4. How can I fix sticky keys on my gaming keyboard?
Sticky keys are usually caused by dirt or grime buildup. Try cleaning the area around the key with compressed air and a microfiber cloth. If the issue persists, remove the keycap and clean it more thoroughly with alcohol and a cotton swab.
5. What should I do if my gaming keyboard stops responding?
If your keyboard stops responding, first check the connection (USB or wireless). If the issue persists, clean the keyboard thoroughly, paying special attention to areas around the keys and switches. If the problem remains, check for hardware issues or driver updates.