A gaming chair is more than just a piece of furniture—it’s a vital component of any gamer’s setup, offering the comfort and support needed for extended gaming sessions. However, to enjoy the full benefits of your new chair, proper assembly is crucial. Incorrect assembly can lead to an unstable or uncomfortable chair, reducing its effectiveness and possibly even voiding the warranty. How to Assemble Your New Gaming Chair
By assembling your gaming chair correctly, you unlock its potential for enhanced comfort, better ergonomic support, and improved gaming performance. An ergonomic gaming chair promotes good posture, reduces fatigue, and minimizes the risk of back pain, allowing you to focus on gameplay instead of discomfort. It also complements your setup, adding a professional and sleek aesthetic to your gaming space.
This guide is designed to make assembling your new gaming chair as easy and stress-free as possible. Whether you’re a DIY enthusiast or someone who’s assembling furniture for the first time, this step-by-step gaming chair assembly guide will walk you through the process. From unboxing the components to troubleshooting common issues, we’ve got you covered. By the end of this guide, you’ll have a fully assembled gaming chair ready to take your gaming sessions to the next level.
Unboxing Your Gaming Chair
Unboxing your new gaming chair is the first step toward setting up your ultimate gaming experience. Before you dive into assembling your chair, it’s crucial to ensure everything is in order. Taking a few minutes to carefully unbox and organize the parts will make the assembly process much smoother.
Importance of Checking the Package for Completeness
When you receive your gaming chair, start by inspecting the box for any signs of damage during shipping. A damaged package may indicate missing or broken parts. Open the box and cross-check the contents against the manual’s included parts list. This ensures you have all necessary components, such as the chair base, backrest, screws, hydraulic piston, and tools. Missing items can derail your assembly, so report any discrepancies to the manufacturer immediately.
List of Items Typically Included
Here’s what you’ll typically find inside the package:
Chair base (often with pre-installed wheels or casters)
Backrest and seat cushion
Hydraulic piston with a protective cover
Armrests (pre-attached or separate)
A bag containing screws, bolts, washers, and caps
An Allen wrench or screwdriver for assembly
Optional items like a lumbar pillow or headrest cushion
Tips for Organizing Components Before Starting
Lay out all the parts on a flat surface, like a table or the floor, and separate them into groups (e.g., tools, hardware, main components). Keep screws and bolts in their original bags or small containers to prevent losing them. Organizing everything helps you identify parts quickly during assembly and reduces the chances of mistakes.
By carefully unboxing and organizing your gaming chair, you set the stage for a smooth and hassle-free assembly process. This step also ensures you won’t encounter unexpected delays due to missing components.
Tools You’ll Need to Assemble Your Gaming Chair
Proper tools and preparation make assembling your gaming chair a smooth and hassle-free process. This section covers the standard tools included with your chair, additional tools that can simplify the process, and essential safety precautions.
Standard Tools Provided with the Chair
Most gaming chairs come with the basic tools needed for assembly, such as an Allen wrench or hex key. These tools are specially designed to fit the screws and bolts included in the package. Before starting, verify that all provided tools are present by checking the instruction manual. If you find anything missing, contact the manufacturer to avoid delays.
Recommended Additional Tools for Easier Assembly
While the provided tools are sufficient, having a few extra items on hand can speed up the process and make assembly more comfortable:
1. Screwdriver: A standard or Phillips-head screwdriver can help with tighter screws or parts not covered by the Allen wrench.
2. Gloves: Wearing gloves protects your hands from blisters and offers a better grip on tools and components.
3. Power Screwdriver (Optional): For those with experience, a power screwdriver can save time, but be cautious not to overtighten screws.
4. Soft Mat or Blanket: Use a soft surface to protect the chair parts and your floor from scratches during assembly.
Safety Precautions to Take During Assembly
1. Work in a Clean, Open Space: Assemble your chair in a clutter-free area to avoid losing small parts or causing accidental damage.
2. Follow the Manual Closely: Incorrect assembly can lead to instability or void the warranty.
3. Double-Check Connections: Ensure all bolts and screws are tightened appropriately but not overtightened, which can strip threads or damage parts.
With the right tools and precautions, assembling your gaming chair can be an enjoyable and stress-free experience. Following these guidelines ensures a safe and sturdy setup, ready to enhance your gaming sessions.
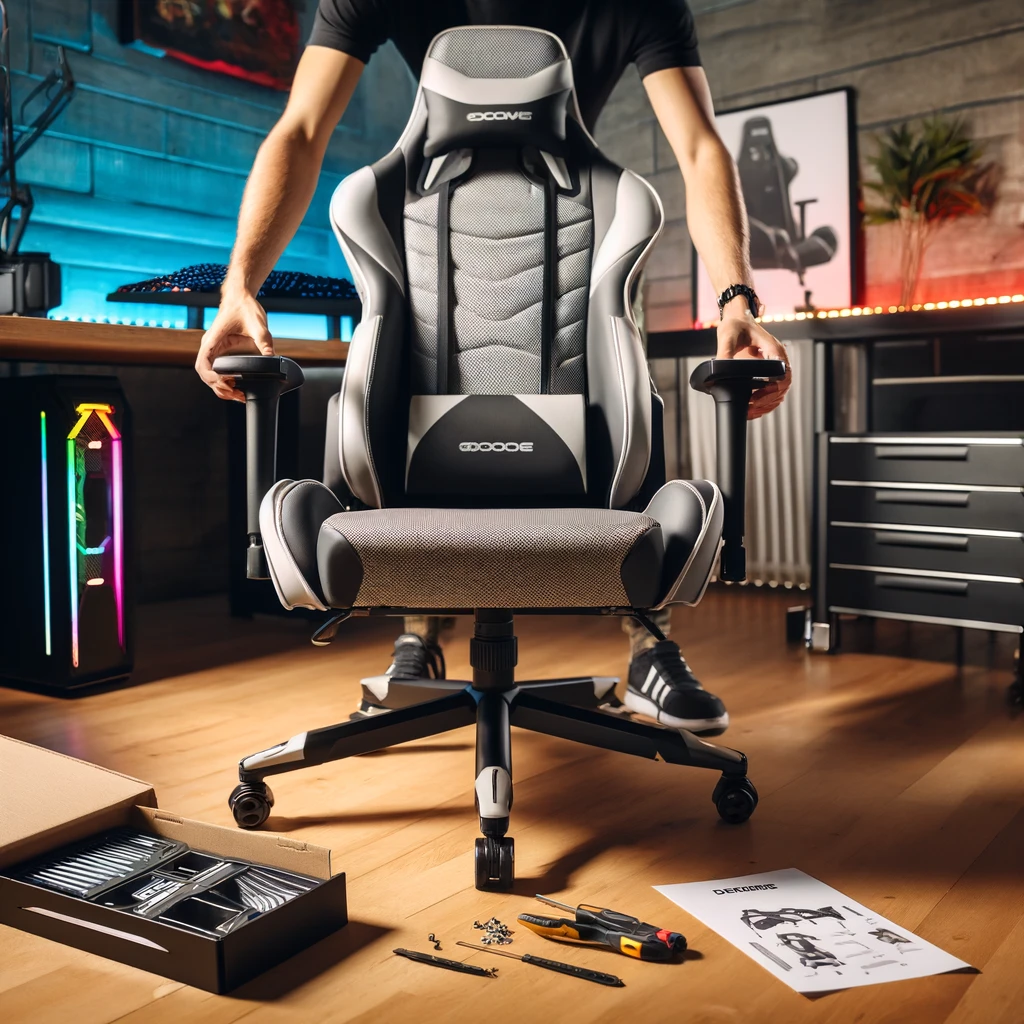
Step-by-Step Assembly Instructions
Step 1: Attach the Wheels to the Chair Base
Start by flipping the chair base upside down on a flat surface. Insert each wheel into the slots on the base by firmly pressing until they snap into place. If your gaming chair requires screws to secure the wheels, use the provided Allen wrench or screwdriver. Ensure all wheels are tightly fitted for smooth movement.
Step 2: Install the Hydraulic Piston and Cover
Turn the chair base upright and insert the hydraulic piston into the central slot. Slide the protective cover over the piston to keep it secure and stable. Proper alignment is crucial to ensure the chair adjusts in height correctly and remains stable during use.
Step 3: Attach the Seat to the Base
Place the seat on top of the hydraulic piston. Align the pre-drilled holes in the seat with the base’s mounting points. Use the screws provided to secure the seat, tightening them evenly. Avoid over-tightening, which could strip the screws or damage the chair components.
Step 4: Connect the Backrest to the Seat
Position the backrest upright behind the seat. Align the brackets on the backrest with the mounting points on the seat. Use the provided bolts and tighten them with an Allen wrench. Ensuring a secure connection prevents wobbling.
Step 5: Install the Armrests
If your gaming chair has detachable armrests, attach them to the seat’s sides. Align the armrest brackets with the designated slots and secure them using screws. Adjust the alignment for maximum comfort.
Step 6: Add Final Touches
Install additional components, such as the headrest, lumbar support pillow, and decorative caps. Double-check all connections for stability. Once complete, test the chair to ensure it’s ready for use.
These step-by-step instructions simplify the gaming chair assembly process, ensuring a sturdy and ergonomic setup.
Troubleshooting Common Assembly Issues
Assembling a gaming chair can sometimes present challenges. Here’s how to handle common issues and ensure your chair is set up correctly.
1. What to Do If Parts Don’t Fit as Expected
If parts don’t seem to fit, double-check the assembly instructions. Often, the issue arises from trying to install components in the wrong order. Ensure you’re using the correct screws or bolts for each step—many gaming chairs include labeled hardware to avoid confusion. If the problem persists, gently adjust or align the parts before attempting to fit them again.
2. Solutions for Wobbly or Unstable Components
A wobbly gaming chair is often due to loose screws or an improperly attached base. Recheck all connections, especially where the seat meets the base or backrest. Tighten any loose screws or bolts using the provided tools, but avoid over-tightening as it could strip the threads. If the chair still feels unstable, verify that the wheels and hydraulic piston are securely in place.
3. Steps to Take If Screws or Bolts Are Missing
Missing screws or bolts can be frustrating but is a common issue. First, check the packaging thoroughly—small parts can easily hide in corners or folds. If you confirm they’re missing, contact the manufacturer or retailer with details, such as the chair model and missing part numbers. Many companies will quickly ship replacements.
4. How to Reach Customer Support for Replacement Parts
Most gaming chair manufacturers offer customer support through phone, email, or their website. Keep your purchase receipt and chair model information handy when contacting them. Check if the company’s FAQ or online support portal has guides for ordering replacement parts. Acting promptly ensures you can complete the assembly without significant delays.
By addressing these common issues, you can confidently assemble your gaming chair and enjoy its ergonomic benefits.

Testing and Adjusting Your Chair
Once you’ve completed assembling your gaming chair, it’s time to ensure everything is functioning as intended. Proper testing and adjustment are essential for optimal comfort and ergonomic support during extended gaming sessions. Follow these steps to get your chair ready for use:
1. Testing the Reclining Feature and Tilt Mechanism
Begin by testing the reclining feature. Slowly lean back to check how smoothly the backrest adjusts to different angles. Most gaming chairs have a locking mechanism for setting the recline at your preferred position. Ensure the tilt mechanism is working correctly by gently rocking the chair back and forth. If you notice any stiffness or irregular movement, double-check the bolts and adjust them as needed.
2. Adjusting the Height for Ergonomic Posture
Next, set the chair’s height using the lever attached to the hydraulic piston. Sit on the chair and position your feet flat on the floor with your knees at a 90-degree angle. This ensures proper blood circulation and reduces strain on your lower back. If your desk height requires additional adjustment, ensure the chair aligns perfectly for a comfortable gaming or working posture.
3. Ensuring Lumbar Support and Armrests Are Set to Your Preference
Gaming chairs often come with adjustable lumbar support and armrests. Position the lumbar pillow to support the natural curve of your spine. Adjust the armrests so your elbows rest comfortably at a 90-degree angle while your hands reach your keyboard or controller effortlessly. Proper alignment reduces shoulder and wrist fatigue during long sessions.
Testing and adjusting your gaming chair ensures that all features are functioning and tailored to your comfort. By taking these steps, you’ll not only enhance your gaming experience but also maintain better posture and reduce physical strain over time.
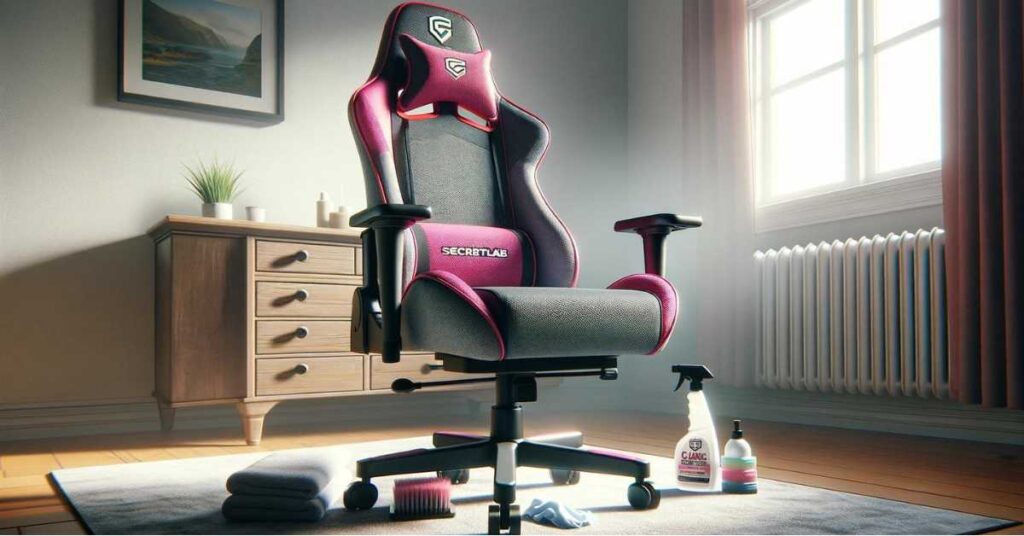
Maintenance Tips for Longevity
To ensure your gaming chair remains in top condition and continues to provide comfort and support, regular maintenance is key. Here are some essential tips to help you get the most out of your new chair.
1. Regularly tighten screws to maintain stability
Over time, the screws and bolts that hold your gaming chair together may loosen due to regular use. To prevent wobbling or instability, check all screws and bolts at least once a month. Use the appropriate tools (usually an Allen wrench or screwdriver) to tighten them securely. Ensuring that all components are properly fastened will keep your chair sturdy and safe during use.
2. Cleaning materials and methods for preserving the chair’s look
Keeping your gaming chair clean not only enhances its appearance but also prolongs its life. Use a microfiber cloth to wipe down the fabric or leather surfaces regularly to remove dust and grime. For deeper cleaning, use a gentle upholstery cleaner that’s safe for your chair’s material. Avoid harsh chemicals or abrasive materials, as they can damage the surface. For chairs with fabric upholstery, consider using a fabric-specific vacuum attachment to remove debris from crevices. Leather chairs can benefit from a leather conditioner to keep the material soft and supple.
3. Checking for wear and tear on moving parts
The moving parts of your gaming chair, such as the tilt mechanism, armrests, and hydraulic piston, are subjected to stress during use. Periodically check these parts for signs of wear or damage. If you notice the tilt mechanism not locking properly or the chair not adjusting as smoothly as it once did, it’s time to inspect and possibly replace the affected components. Pay close attention to the wheels and casters as well—ensure they roll smoothly and are free of debris. Replacing damaged or worn-out parts early can prevent further issues and ensure your chair remains functional for years to come.
By following these maintenance tips, you can keep your gaming chair in excellent condition, ensuring maximum comfort and support for every gaming session.
Bonus Tips for First-Time Users
As a first-time gaming chair owner, it’s essential to maximize the comfort and benefits it provides. Here are some bonus tips to help you make the most out of your new chair, ensuring an optimal gaming experience.
1. How to Make the Most of Your Gaming Chair During Gaming Sessions
A gaming chair isn’t just about sitting comfortably; it’s designed to enhance your performance and comfort. Make sure to adjust the height so your feet are flat on the floor, and your knees are at a 90-degree angle. Recline the backrest slightly to avoid strain during long gaming sessions, allowing your spine to remain supported. Remember to adjust the armrests to the correct height to keep your shoulders relaxed, preventing tension in your neck and back.
2. Ergonomic Tips for Extended Use
If you’re going to be gaming for hours, ergonomics should be your priority. Start by adjusting the lumbar support to fit your lower back curve. This feature ensures proper posture and prevents discomfort. Take regular breaks, standing up and stretching every 30 to 60 minutes, to promote circulation and reduce the risk of stiffness. Adjust the recline function so you can lean back comfortably during breaks or while chatting with friends, giving your body a rest between intense gaming sessions.
3. Enhancing Your Gaming Setup with Complementary Accessories
A gaming chair setup is only as good as the accessories that complement it. Consider adding a gaming desk with an adjustable height feature for perfect alignment with your chair. A footrest can further enhance comfort by reducing pressure on your legs. You may also want to invest in headset stands, gaming mats, or a monitor stand for improved posture and organization. The right accessories can not only improve comfort but also elevate your overall gaming experience.
By following these tips, you’ll ensure that your new gaming chair isn’t just assembled properly, but also serves you well during long sessions.

Conclusion
Assembling your gaming chair correctly is simpler than it might seem. By following a few easy steps, you can set up your chair in no time, ensuring it provides the comfort and support needed for long gaming sessions. Proper assembly not only maximizes the chair’s ergonomic benefits but also helps maintain its durability, ensuring you get the most out of your investment. Whether you’re a first-time assembler or a seasoned pro, this guide has provided the essential steps and troubleshooting tips to make the process smooth and stress-free.
We’d love to hear about your experience! Feel free to share any tips or challenges you faced during the assembly process in the comments section below. If you run into any issues or have further questions about assembling your gaming chair, don’t hesitate to reach out. Our team is here to help.
If you’re looking for more information on gaming chair setup, ergonomics, or the best gaming chairs on the market, check out our related articles. We’ve got plenty of resources to help you create the ultimate gaming setup. Happy assembling, and enjoy your new chair!
FAQs for How to Assemble Your New Gaming Chair
1. What tools do I need to assemble a gaming chair?
Most gaming chairs come with basic tools like an Allen wrench, but you may also need a standard screwdriver for certain parts. Optional tools like gloves or a power screwdriver can make assembly easier.
2. How long does it take to assemble a gaming chair?
On average, it takes 30-60 minutes to assemble a gaming chair. The time may vary depending on the chair’s complexity and your familiarity with assembling furniture.
3. What should I do if parts are missing or damaged?
If you find missing or damaged parts, contact the manufacturer or retailer immediately. Many companies provide replacement parts free of charge within the warranty period.
4. Can I assemble a gaming chair by myself, or do I need help?
Most gaming chairs are designed to be assembled by one person. However, having an extra pair of hands can be helpful, especially for attaching the backrest or aligning components.
5. How do I fix a wobbly gaming chair after assembly?
Check that all screws and bolts are tightened properly. If the issue persists, ensure that the hydraulic piston and base are securely attached. Refer to the manufacturer’s troubleshooting guide or contact support for further assistance.