Maintaining a gaming laptop in pristine condition is crucial for ensuring its longevity and optimal performance. One of the most essential aspects of this maintenance is regularly cleaning the dust from your gaming laptop. Dust buildup can significantly impact your device, causing various issues that degrade its performance over time. By understanding the importance of this maintenance task, you can prolong the lifespan of your gaming laptop and keep it running smoothly. .how to clean dust from gaming laptop.
When dust accumulates inside a gaming laptop, it can obstruct airflow, which is vital for cooling the internal components. Without proper airflow, the laptop is prone to overheating. Overheating can lead to thermal throttling, where the CPU and GPU slow down to prevent damage, causing a noticeable drop in performance. This not only affects your gaming experience but can also lead to permanent damage if not addressed. Regularly cleaning the dust from your gaming laptop helps maintain a steady airflow, ensuring that the cooling system functions efficiently and the internal components stay at safe temperatures.
Another common issue caused by dust accumulation is increased noise from the laptop’s fans. As dust settles on the fan blades and heatsinks, the cooling system must work harder to dissipate heat. This increased effort results in louder fan noise, which can be distracting and annoying during gaming sessions. By removing the dust, you can reduce the strain on the fans, leading to a quieter and more pleasant gaming environment.
Dust can settle on various components inside the laptop, potentially causing short circuits or other electrical problems. Ensuring that your gaming laptop is free of dust helps prevent such issues, contributing to the overall health and functionality of your device.
Tools and Materials Needed
Cleaning dust from your gaming laptop requires the right tools to ensure a thorough and safe process. Here’s a list of essential tools you’ll need to get started. First, a compressed air canister is indispensable for blowing dust out of hard-to-reach areas without causing damage. This tool is highly effective in removing dust from vents and internal components, ensuring optimal airflow. A soft brush is also necessary for gently dislodging stubborn dust particles from delicate components without causing scratches or static damage. A microfiber cloth is perfect for wiping down the exterior surfaces and the keyboard, leaving no lint or scratches behind.
A small screwdriver set is crucial for accessing the interior of the laptop. Laptops have various small screws that need to be removed to open the bottom panel, and having the right screwdriver ensures you won’t strip the screws or damage the laptop. Lastly, an anti-static wrist strap is a vital tool for preventing static electricity from damaging sensitive electronic components during the cleaning process. By grounding yourself, you can safely handle the internal parts of your gaming laptop.
For those looking to perform a more in-depth cleaning, several optional tools can enhance the process. Isopropyl alcohol, particularly in high concentrations (90% or higher), is excellent for cleaning thermal paste residue from the CPU and GPU. This step is crucial for those who want to reapply thermal paste to improve heat dissipation. Speaking of thermal paste, having a fresh tube on hand is beneficial for advanced users who wish to replace the old paste. This can significantly improve the cooling efficiency of your laptop.
Additionally, a small vacuum cleaner with a soft brush attachment can be useful for gently removing dust from larger areas inside the laptop without causing damage. By using these tools, you can ensure a comprehensive and effective cleaning process, keeping your gaming laptop in peak condition and preventing overheating issues.
Preparation
Safety Precautions
Before diving into the actual process of cleaning dust from your gaming laptop, it’s crucial to take several safety precautions to ensure both your safety and the safety of your device. First and foremost, always power off the laptop. Working on a powered device poses risks of electric shock and potential damage to the laptop’s internal components. After powering down, disconnect all peripherals. This includes any external devices such as a mouse, keyboard, or external hard drives. Disconnecting these devices prevents accidental damage and ensures you have clear access to the laptop itself.
Next, if your laptop model allows, remove the battery. This step is particularly important as it helps to eliminate any residual power that might still be present in the device. Removing the battery can also prevent accidental powering on during the cleaning process. Refer to your laptop’s manual for specific instructions on how to safely remove the battery, as the method can vary between models.
It’s equally important to work in a static-free environment. Static electricity can severely damage electronic components, so grounding yourself before starting is essential. Use an anti-static wrist strap if you have one, or periodically touch a grounded metal object to discharge any static buildup. Wearing cotton clothes instead of synthetic materials can also help reduce static electricity.

Setting Up a Clean Workspace
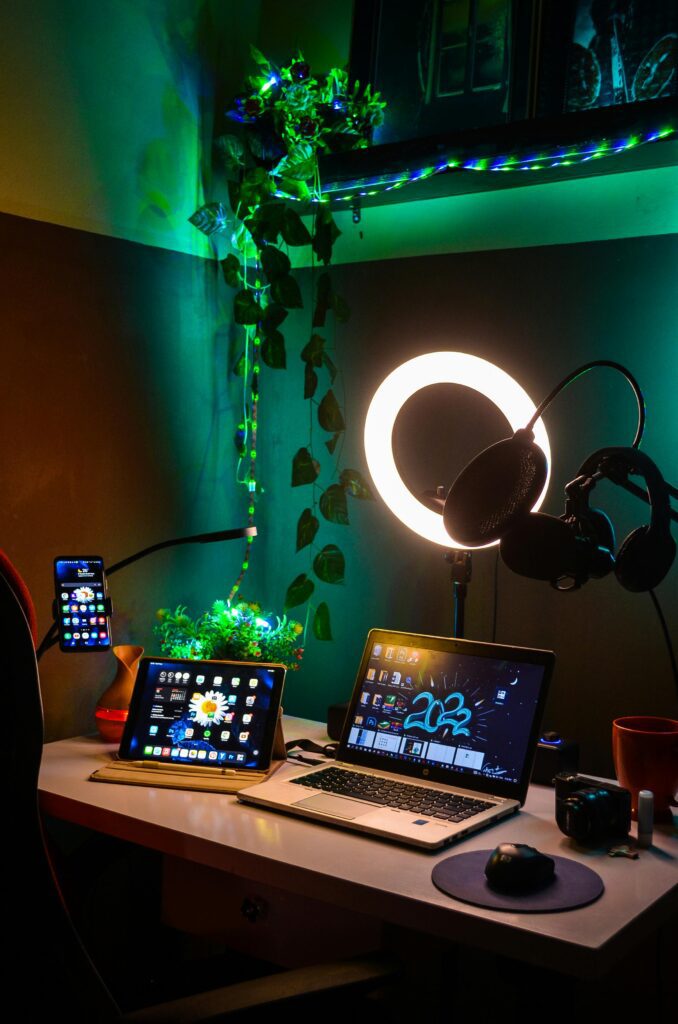
Creating an appropriate workspace is another vital step in preparing to clean your gaming laptop. Start by choosing a clean, flat surface. A spacious desk or table is ideal as it provides enough room to lay out your tools and the laptop. Clear the area of any unnecessary items to avoid clutter, which can lead to misplaced parts or tools.
Good lighting is essential for this task. Ensure your workspace is well-lit, either by natural light or with the help of a desk lamp. Proper lighting helps you see the small screws and components clearly, reducing the risk of mistakes during the disassembly and reassembly process.
Organizing your tools and materials beforehand is also crucial. Have all your cleaning tools within easy reach, such as a compressed air canister, a soft brush, a microfiber cloth, and a small screwdriver set. Additionally, having a container or tray for screws and small parts is highly recommended. This prevents the small components from getting lost and helps you keep track of everything you remove from the laptop.
To sum up, preparing to clean dust from your gaming laptop involves a few essential steps. Power off the device and disconnect all peripherals to avoid any electrical hazards. If possible, remove the battery to ensure no power is running through the laptop. Always work in a static-free environment to protect the sensitive electronic components inside the laptop.
When setting up your workspace, ensure it is clean, flat, and spacious enough to accommodate your tools and the laptop. Good lighting is crucial for visibility, and organizing your tools beforehand will make the process smoother. Having a container for screws and small parts will keep everything in order and prevent loss. By carefully following these preparation steps, you set the stage for a safe, efficient, and effective cleaning process, ultimately helping to maintain your gaming laptop’s performance and longevity.
Basic Cleaning Steps
External Cleaning
Maintaining the cleanliness of your gaming laptop’s exterior is the first step in ensuring optimal performance and longevity. Start by wiping down the laptop’s outer surfaces with a microfiber cloth. This cloth is ideal for gently removing dust and fingerprints without scratching the surface. Pay special attention to areas that accumulate grime, such as the lid, base, and palm rest. For stubborn spots, slightly dampen the cloth with water or a mild cleaning solution, ensuring the laptop is powered off and unplugged to avoid any electrical mishaps.
Next, turn your attention to the keyboard and touchpad, as these components are frequent victims of dust, crumbs, and oils from your fingers. Use a soft brush or a handheld vacuum with a brush attachment to remove debris between the keys. For a more thorough clean, you can use a slightly dampened microfiber cloth or specialized keyboard cleaning wipes to gently wipe each key and the touchpad. Avoid using excessive liquid, as this can seep into the keyboard and cause damage. By keeping these external parts clean, you not only improve the laptop’s appearance but also enhance your overall user experience.
Cleaning the Vents
One of the most crucial aspects of cleaning your gaming laptop is ensuring that the vents are free of dust and debris. These vents are essential for maintaining proper airflow and preventing overheating, which can significantly affect your laptop’s performance. Begin by locating the vents, which are typically found on the sides, back, or bottom of the laptop. Refer to your laptop’s manual if you’re unsure of their exact location.
Once you’ve identified the vents, use a can of compressed air to blow out the dust. Hold the can upright and apply short bursts of air to avoid moisture buildup from the propellant. Aim the nozzle at the vent openings, keeping a small distance to ensure the dust is effectively expelled without pushing it further inside. It’s helpful to tilt the laptop at different angles during this process to dislodge any trapped particles. If you notice dust accumulating on the surface during the cleaning, wipe it away with a microfiber cloth.
To avoid damaging internal components, never insert objects into the vents or use a high-powered air compressor. Such actions can harm the delicate internal parts or dislodge important components. If the vents are severely clogged and compressed air isn’t sufficient, you may need to consider more advanced internal cleaning, which involves opening the laptop. However, for regular maintenance, cleaning the vents with compressed air should suffice in keeping your gaming laptop running cool and efficiently.
By routinely performing these basic cleaning steps, you can prevent dust buildup that leads to overheating and hardware failure. Not only will this help in maintaining your gaming laptop’s performance, but it will also extend its lifespan. Regular cleaning is a simple yet effective way to ensure that your gaming sessions remain uninterrupted and your device stays in top condition. Remember, a clean laptop is a happy laptop, and consistent care will keep it functioning smoothly for years to come.
Internal Cleaning Steps
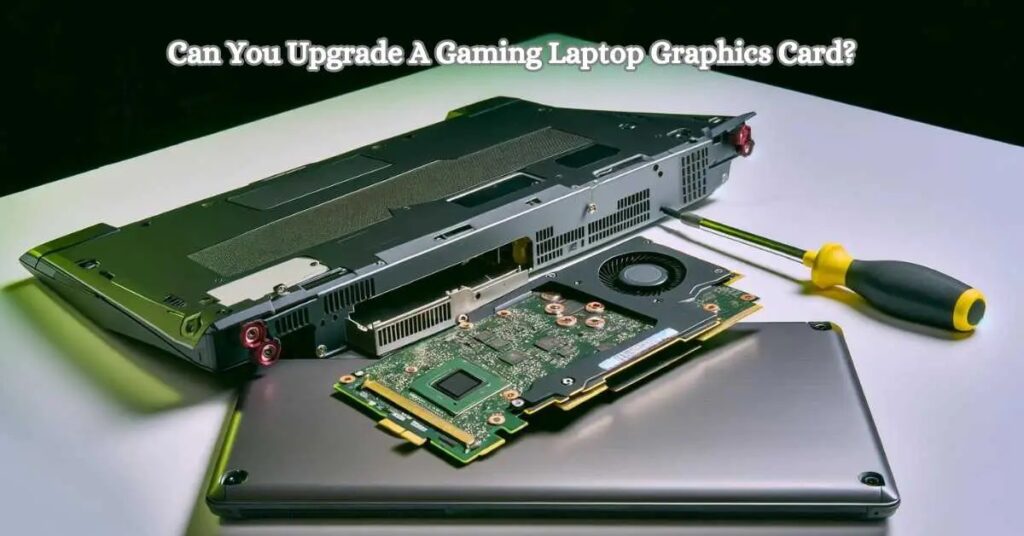
Accessing the Laptop’s Interior
Before you can effectively clean the internal components of your gaming laptop, you need to access its interior. The first step is to reference your laptop’s manual. Every model is slightly different, and the manual will provide specific instructions on how to safely open your laptop. Most manuals can be found online if you no longer have the physical copy. It’s crucial to follow the manufacturer’s guidelines to avoid damaging any components. Generally, you’ll need to remove the bottom panel or keyboard to get inside.
This typically involves unscrewing several screws; a small screwdriver set will be handy here. Be careful to keep track of all screws and small parts, perhaps in a dedicated container, to ensure nothing gets lost during the process.
Cleaning Internal Components
Once you have successfully opened your laptop, you can begin cleaning the internal components. Start by blowing out dust from the fans and heatsinks using a compressed air canister. Hold the canister upright and use short bursts of air to prevent any condensation from forming. Make sure to blow air through all vents and openings to dislodge dust that might be trapped inside. It’s important to clean the fans thoroughly since dust buildup here can significantly impact your laptop’s cooling efficiency, leading to overheating issues.
Next, use a soft brush to gently brush off any stubborn dust that remains on the components. Be particularly careful around delicate parts like the motherboard and RAM. A microfiber cloth can also be used to wipe down larger areas gently. Avoid using liquids like isopropyl alcohol unless absolutely necessary and only on components like the heatsinks where it can help remove grime without causing damage.
Make sure you also clean the motherboard and other internal parts. This step might seem daunting, but it’s essential for maintaining your laptop’s performance. Use the compressed air and brush to remove any dust from the motherboard, paying special attention to areas around connectors and ports. By keeping the motherboard clean, you help ensure that all the components function optimally and prevent issues related to dust accumulation, such as short circuits or poor connectivity.
Reassembly Tips
After you’ve finished cleaning, it’s time to reassemble your laptop. Start by ensuring that all screws and parts are securely in place. Refer back to your manual if necessary to confirm the correct placement of each component. Carefully reattach the bottom panel or keyboard, making sure all clips and connectors are properly aligned. It’s crucial to take your time during reassembly to avoid causing any damage to the components.
Reconnect the battery and any peripherals you had disconnected earlier. Before powering on the laptop, do a final check to ensure that everything is in place and nothing has been left loose inside. Power on your laptop and check that it boots up correctly. If everything is functioning as expected, you’ve successfully cleaned your gaming laptop’s interior.
By following these steps, you can effectively remove dust from your laptop’s internal components, significantly improving its cooling efficiency and overall performance. Regular internal cleaning is essential for maintaining your gaming laptop and preventing issues like overheating. With the right tools and a careful approach, you can keep your laptop running smoothly for years to come.
Advanced Cleaning (For Experienced Users)
Replacing Thermal Paste
Replacing the thermal paste is a crucial task in maintaining a gaming laptop, especially when addressing overheating issues. Thermal paste plays a vital role in heat dissipation by filling microscopic gaps between the CPU/GPU and the heatsink, ensuring efficient heat transfer. Over time, the thermal paste can dry out, leading to increased temperatures and reduced performance. For experienced users, replacing the thermal paste can significantly enhance the laptop’s cooling efficiency.
To begin, gather the necessary tools: high-quality thermal paste, isopropyl alcohol (preferably 90% or higher), cotton swabs, and a plastic or wooden spatula. First, power down the laptop, disconnect all peripherals and remove the battery if possible. Carefully disassemble the laptop to access the CPU and GPU. This process varies depending on the model, so refer to the laptop’s manual or a reliable online guide specific to your device.
Once you’ve exposed the CPU and GPU, gently remove the heatsink. You’ll notice the old thermal paste on both the heatsink and the chips. Using a cotton swab dipped in isopropyl alcohol, clean off the old thermal paste thoroughly. Ensure both surfaces are free of any residue, as any leftover paste can interfere with the new application.
Next, apply a small amount of new thermal paste to the center of the CPU and GPU. A pea-sized dot or a thin line is usually sufficient. Avoid over-application, as excess paste can spill over the edges and potentially cause short circuits. Spread the paste evenly using a spatula or by reattaching the heatsink and allowing the pressure to distribute it naturally. Reassemble the laptop, ensuring all screws and connections are secure. Power on the laptop and monitor the temperatures to ensure the new thermal paste is effectively reducing heat.
Cleaning and Lubricating Fans
Fans play a pivotal role in maintaining airflow and cooling in a gaming laptop. Over time, dust can accumulate on the blades and inside the fan housing, leading to reduced efficiency and increased noise. For a thorough cleaning, experienced users might consider disassembling the fans to clean and lubricate them.
Begin by powering down the laptop and removing the back panel to access the fans. Carefully disconnect the fan connectors from the motherboard. Depending on the design, you may need to unscrew the fans or release clips holding them in place. Once removed, use a soft brush or compressed air to clean the fan blades and housing. Be gentle to avoid damaging the delicate components.
For lubrication, choose a suitable lightweight oil or lubricant specifically designed for small electric motors. Apply a small drop to the fan’s central bearing, which is usually accessible through a small hole or by removing a sticker. Spin the fan blades manually to distribute the lubricant evenly, ensuring smooth and quiet operation. Avoid over-lubricating, as excess oil can attract more dust and lead to build-up.
Reattach the fans to the laptop, ensuring all connectors are properly seated and secure. Replace the back panel and power on the laptop. Check the fan operation to ensure they are running smoothly and quietly. Regular cleaning and occasional lubrication can significantly extend the lifespan of the fans and maintain optimal airflow, preventing the laptop from overheating during intensive gaming sessions.
By incorporating these advanced cleaning techniques, you can effectively maintain and improve your gaming laptop’s performance, ensuring it stays in top condition for a longer time.
Maintenance Tips
Regular Cleaning Schedule
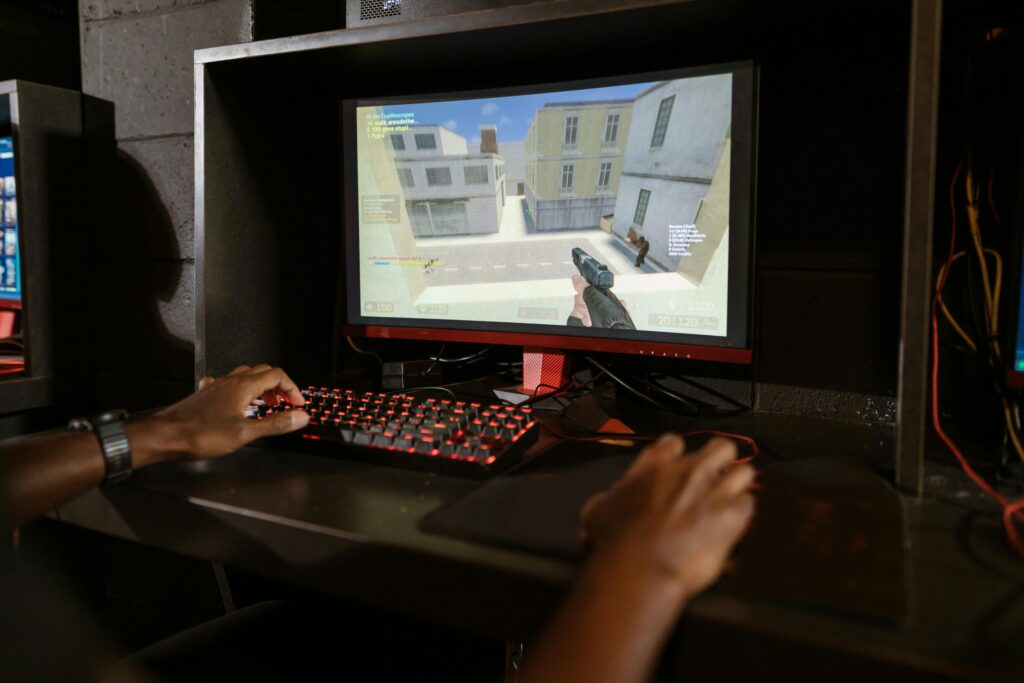
Maintaining a regular cleaning schedule for your gaming laptop is essential to ensure its longevity and optimal performance. Cleaning dust from your gaming laptop should be done at least every three to six months, depending on the environment in which it is used. If you often use your laptop in a dusty room or on soft surfaces like beds and sofas, you may need to clean it more frequently. Signs that your laptop needs cleaning include increased fan noise, noticeable heat from the laptop’s base, and a decrease in performance during gaming sessions. Regular maintenance prevents dust buildup, which can cause overheating and damage internal components over time.
A good practice is to set a reminder on your calendar to clean your laptop regularly. This ensures you don’t forget and allows you to catch dust accumulation before it becomes a significant issue. During your scheduled cleaning, make sure to follow the steps outlined in this guide, including cleaning the vents and the internal components if you’re comfortable doing so. By sticking to a regular cleaning schedule, you can prevent common issues like overheating and maintain your laptop’s performance and efficiency.
Preventive Measures
Preventive measures are just as important as regular cleaning in maintaining your gaming laptop’s health. One of the most effective preventive measures is using a laptop cooling pad. A cooling pad helps to improve airflow around your laptop, reducing the temperature of its internal components and minimizing the chances of overheating. When selecting a cooling pad, look for one with adjustable fan speeds and ergonomic design for added comfort during use.
Keeping your laptop in a dust-free environment is another crucial preventive measure. Try to use your laptop in clean, well-ventilated rooms and avoid areas with high dust levels, such as near open windows or on carpets. Regularly dust the area where you use your laptop to reduce the amount of airborne dust that could be sucked into the laptop’s cooling system. Additionally, store your laptop in a protective case when not in use to shield it from dust and other environmental factors.
Avoiding the use of your laptop on soft surfaces like beds, sofas, and carpets is essential. These surfaces can block the laptop’s vents, restricting airflow and causing the device to overheat. Instead, use your laptop on hard, flat surfaces like desks or tables, which allow for better ventilation. If you must use your laptop on a soft surface, consider placing a hard, flat object like a book or a laptop stand underneath it to ensure proper airflow.
Implementing these preventive measures, along with maintaining a regular cleaning schedule, will significantly reduce the risk of dust buildup and overheating. This proactive approach not only extends the lifespan of your gaming laptop but also ensures it operates at peak performance, allowing you to enjoy your gaming sessions without interruptions. By taking care of your laptop and being mindful of its environment, you can prevent many common issues associated with dust accumulation and overheating, keeping your device running smoothly for years to come.

Conclusion
Regular maintenance is crucial for keeping your gaming laptop in top condition. By cleaning dust from your gaming laptop, you ensure its longevity and maintain optimal performance. We discussed the importance of removing dust to prevent overheating and maintaining efficient airflow. The basic cleaning steps involve wiping down the exterior, cleaning the keyboard and vents, and using compressed air to remove dust. For those comfortable with more advanced methods, internal cleaning includes accessing the laptop’s interior, cleaning internal components, and replacing thermal paste.
Maintaining your gaming laptop’s health offers numerous benefits, including improved performance, extended lifespan, and reduced noise from fans. Regularly cleaning your laptop prevents dust buildup, which can cause overheating and damage internal components. Implementing a regular cleaning schedule and taking preventive measures, such as using a cooling pad and avoiding soft surfaces, can significantly enhance your laptop’s performance and durability.
Incorporating these best practices ensures your laptop remains a reliable and powerful tool for gaming. Stay proactive with your maintenance routine, and enjoy a seamless gaming experience free from the frustrations of dust-related issues. Your gaming laptop is an investment, and with proper care, it will continue to serve you well for years to come.
Frequently Asked Questions (FAQs) how to clean dust from gaming laptop
1. How often should I clean dust from my gaming laptop?
It’s recommended to clean your gaming laptop every 3-6 months, depending on your environment. If you notice signs of overheating, fan noise, or reduced performance, it’s time for a cleaning.
2. Can I use a vacuum cleaner to remove dust from my laptop?
While a vacuum cleaner can be used with a soft brush attachment to clean the exterior, it’s safer to use compressed air for internal components. Vacuum cleaners can generate static electricity, which can damage sensitive electronic parts.
3. Is it necessary to replace the thermal paste when cleaning my laptop?
Replacing thermal paste isn’t always necessary, but if your laptop is still overheating after cleaning, it might help. Thermal paste helps with heat dissipation and can degrade over time, especially in gaming laptops.
4. Can I clean my gaming laptop without opening it?
Yes, you can clean the vents and exterior without opening your laptop. However, for a thorough cleaning, especially if there is significant dust buildup, accessing the internal components is more effective.
5. What are the signs that my gaming laptop needs cleaning?
Common signs include overheating, loud or constantly running fans, reduced performance, and sudden shutdowns. Regular maintenance can prevent these issues and keep your laptop running smoothly.