Upgrading your gaming setup is an exciting journey, and investing in a high-quality gaming chair can significantly enhance your overall experience. According to recent studies, gamers who prioritize ergonomic setups report reduced discomfort and improved performance during long gaming sessions. One of the standout options in the market is the X Rocker gaming chair, known for its immersive audio experience and unparalleled comfort. With built-in speakers, vibration motors, and various connectivity options, the X Rocker gaming chair offers a new level of engagement, making it a favorite among both casual and professional gamers. how to connect x rocker gaming chair
However, to fully enjoy these benefits, proper setup is crucial. Many gamers find themselves overwhelmed with the different connection options available, whether it’s to a console, PC, or mobile device. That’s where this guide comes in. Our goal is to provide you with a comprehensive, step-by-step guide on how to connect your X Rocker gaming chair seamlessly to any gaming system. Whether you’re setting it up for the first time or troubleshooting an existing connection, we’ve got you covered. Let’s dive in and make sure you get the most out of your X Rocker gaming chair, enhancing your gaming experience to its fullest potential.
Understanding Your X Rocker Gaming Chair
The X Rocker gaming chair is a versatile and immersive addition to any gamer’s setup, offering a range of models to suit different needs. Broadly, these chairs can be categorized into wireless and wired models. Wireless X Rocker chairs provide greater flexibility and ease of movement, eliminating the hassle of tangled wires. In contrast, wired models ensure a stable and uninterrupted connection, ideal for high-stakes gaming sessions. Regardless of the type, many X Rocker chairs come equipped with built-in speakers and subwoofers, delivering rich, immersive audio that enhances the gaming experience. Additionally, vibration motors sync with the game’s audio, providing tactile feedback that adds a new dimension to gameplay.
Each X Rocker gaming chair includes several key components and accessories designed to enhance functionality and user experience. The control panel, typically located on the side of the chair, allows users to adjust volume, bass, and connectivity settings easily. Audio cables are included for connecting the chair to various gaming systems, ensuring seamless audio transmission. The power supply unit is crucial for powering the chair’s features, from the audio system to the vibration motors. Understanding these components and their roles is essential for a smooth setup and optimal use of your X Rocker gaming chair.
Pre-Setup Preparations
Before diving into the connection process, it’s crucial to ensure your X Rocker gaming chair is ready for setup. Start by carefully unboxing your chair, taking note of each component and accessory included. Inspect all items for any damages or missing parts, as this initial step can prevent future headaches. Pay close attention to the control panel, audio cables, and power supply. Once everything is accounted for, take a moment to read the user manual. This document is an invaluable resource, providing detailed instructions and troubleshooting tips specific to your X Rocker chair model.
Next, consider the location where you will place your X Rocker gaming chair. Choosing the right spot can significantly enhance your gaming experience. Ideally, find a space that is close to your gaming console, PC, or mobile device to minimize the length of cables and potential trip hazards. Ensure the area has adequate ventilation and room for you to move comfortably. Additionally, think about the chair’s proximity to power outlets to avoid using excessive extension cords. By carefully unboxing, reading the manual, and selecting the optimal location, you’ll set a solid foundation for a smooth and enjoyable X Rocker gaming chair setup.
Connecting to Different Gaming Systems
Connecting your X Rocker gaming chair to various gaming systems can significantly enhance your gaming experience. This section will provide detailed instructions for connecting the chair to consoles, PCs, and mobile devices, ensuring you get the best out of your X Rocker chair setup.
Connecting to a Console (PS4, PS5, Xbox One, Xbox Series X)
Wired Connection
To connect your X Rocker gaming chair to a console via a wired connection, start by locating the audio cables that came with your chair. Plug the red and white RCA cables into the corresponding ports on the chair’s control panel. Next, connect the other ends of the RCA cables to the TV’s audio output ports. If your TV lacks RCA output ports, use an RCA to 3.5mm adapter, plugging the 3.5mm end into the TV’s headphone jack. Ensure the chair is powered on and switched to the appropriate input source on the chair’s control panel. Adjust the volume settings for optimal audio quality.
Wireless Connection
For a wireless connection, first, ensure your gaming chair and console are powered on. On the chair’s control panel, set the wireless mode by selecting the corresponding input. Use the wireless transmitter provided with the chair and connect it to the console’s audio output port. The transmitter will send audio signals wirelessly to the chair. Adjust the chair’s volume and vibration settings as needed. Detailed images or diagrams can help clarify this process if you encounter any difficulties.
Connecting to a PC
Wired Connection
Connecting your X Rocker gaming chair to a PC using a wired connection involves similar steps to the console setup. Connect the RCA cables from the chair to the audio output ports on your PC. If your PC lacks RCA ports, use a 3.5mm audio cable, connecting it from the chair’s control panel directly to the PC’s headphone jack. Ensure all connections are secure and switch the input mode on the chair to match your setup. Refer to your chair’s manual for any model-specific instructions and use diagrams for further clarity.
Bluetooth Connection
For a Bluetooth connection, activate Bluetooth on both the chair and your PC. On your PC, go to Bluetooth settings and search for available devices. Select your X Rocker chair from the list of available devices to pair them. Once paired, set the chair to Bluetooth mode on the control panel. Ensure the volume is adjusted to your preference. Detailed diagrams or images can assist in this setup if needed.
Connecting to a Mobile Device
Using Bluetooth
Connecting your X Rocker gaming chair to a mobile device via Bluetooth is straightforward. Ensure Bluetooth is enabled on your mobile device and the chair. On your mobile device, search for available Bluetooth devices and select your X Rocker chair. Once paired, set the chair to Bluetooth mode on the control panel. Adjust the volume and vibration settings on the chair to enhance your mobile gaming experience. Use diagrams or images to guide you through any issues that may arise.
Connecting Multiple Chairs for Multiplayer Experience
For a multiplayer experience, connecting multiple X Rocker gaming chairs involves daisy-chaining the chairs together. Use the provided cables to connect the audio output of one chair to the audio input of the next. Ensure all chairs are set to the appropriate input mode and powered on. This setup allows multiple players to enjoy synchronized audio and vibration feedback. Refer to the user manual for specific instructions and diagrams to ensure a seamless setup process.
Optimizing Audio and Vibration Settings
Optimizing the audio and vibration settings of your X Rocker gaming chair is crucial for a fully immersive gaming experience. Start by adjusting the audio settings to suit your preferences. The control panel on your X Rocker chair allows you to easily manage the volume. Ensure that the volume is set to a comfortable level that enhances your gaming experience without causing discomfort. Balancing game and chat audio is equally important, especially during multiplayer sessions. Use the controls to fine-tune the balance so that you can hear both the game sounds and your teammates clearly, creating an optimal audio environment for gaming.
Customizing the vibration feedback of your X Rocker chair can significantly enhance your gameplay. To adjust the intensity of the vibrations, use the settings on the control panel. Some games offer more impactful experiences with stronger vibrations, while others may be more enjoyable with subtle feedback. Experiment with different levels to find what works best for you. Synchronizing the vibration with game audio can provide an added layer of immersion. Ensure that the vibrations match the in-game actions, such as explosions or car engines, to enhance realism and engagement.
Despite careful setup, you may encounter common audio and vibration issues. If you experience no sound or weak sound, first check all connections to ensure they are secure. Verify that the audio source is correctly selected and that the volume is turned up on both the chair and the connected device. For no vibration or weak vibration, make sure the vibration feature is enabled in the chair settings and that it is compatible with your current game or device. Following a step-by-step troubleshooting guide can help resolve these issues efficiently, ensuring that your X Rocker gaming chair performs at its best.
Maintenance and Care Tips
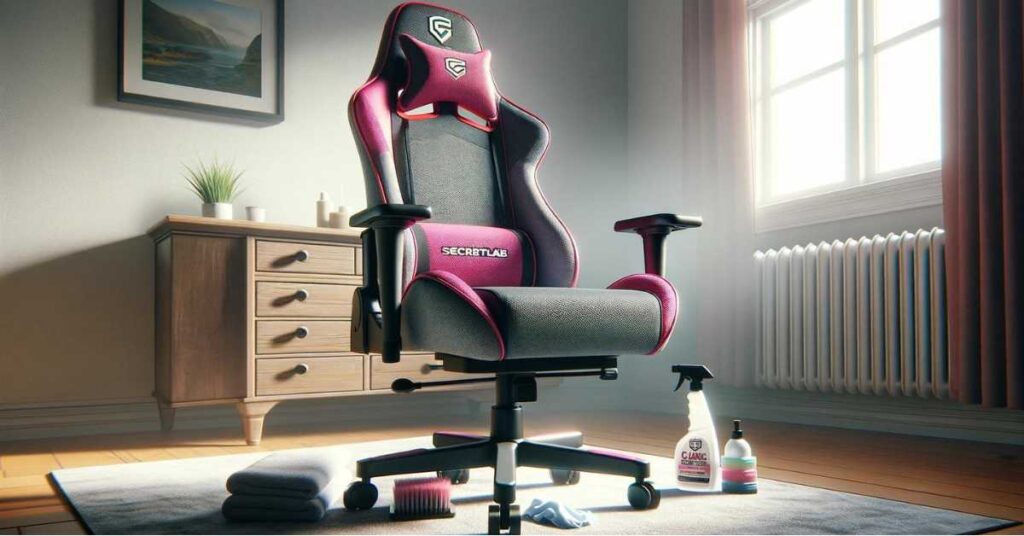
Proper maintenance and care of your X Rocker gaming chair ensure its longevity and optimal performance. Regular cleaning is crucial for maintaining both the upholstery and the electronics. For the upholstery, use a soft cloth and mild detergent to wipe down the chair, avoiding harsh chemicals that could damage the material. When cleaning the electronics, ensure the chair is unplugged to avoid any electrical hazards. Use a dry cloth to gently clean the control panel and other electronic components. Regular inspections for wear and tear are equally important. Check for any loose connections, frayed wires, or damaged components that might need repair or replacement. This preventive measure helps avoid potential issues during intense gaming sessions.
Conclusion
In this comprehensive guide, we’ve walked you through the essential steps to successfully set up your X Rocker gaming chair. From understanding the various models and components to preparing your gaming area and making all the necessary connections, we’ve covered everything you need to know. We detailed how to connect your X Rocker chair to different gaming systems, including consoles, PCs, and mobile devices, ensuring you can enjoy its full range of features. Additionally, we provided tips for optimizing audio and vibration settings to enhance your gaming experience further, along with maintenance advice to keep your chair in top condition.
Now that you have all the information needed to set up and enjoy your X Rocker gaming chair, it’s time to dive into your favorite games and experience the immersive audio and comfort it offers. Remember, the setup process is straightforward, and with this guide, you can troubleshoot any issues that may arise. Embrace the enhanced comfort and functionality of your X Rocker chair, and transform your gaming sessions into truly immersive experiences. Feel free to share your setup and any additional tips you have in the comments, and don’t forget to follow our blog for more gaming-related content and guides. Happy gaming!
FAQs for how to connect x rocker gaming chair
1. How do I connect my X Rocker gaming chair to a PS5?
To connect your X Rocker gaming chair to a PS5, use the included audio cables to connect the chair’s control panel to the PS5’s audio output. Alternatively, you can connect wirelessly using Bluetooth if your chair supports it. Detailed steps can be found in our guide under the “Connecting to a Console” section.
2. Can I connect multiple X Rocker chairs for a multiplayer experience?
Yes, you can connect multiple X Rocker chairs for a multiplayer experience. You can daisy-chain the chairs using audio cables, allowing each player to enjoy the immersive audio and vibration features of their own chair.
3. Why isn’t my X Rocker chair producing any sound?
If your X Rocker chair isn’t producing sound, ensure all cables are securely connected and the power is turned on. Check the volume settings on both the chair and your gaming system. Refer to our troubleshooting section for more detailed solutions.
4. How do I connect my X Rocker chair to a PC?
You can connect your X Rocker chair to a PC either using audio cables or Bluetooth. For wired connections, plug the chair’s audio cables into the PC’s audio output. For Bluetooth, follow the pairing instructions in the chair’s manual. Detailed steps are available in our guide.
5. Can I use my X Rocker chair with mobile devices?
Yes, you can connect your X Rocker chair to mobile devices using Bluetooth. Ensure your chair is in pairing mode and connect it through your device’s Bluetooth settings. Detailed instructions can be found in our guide.
6. How do I adjust the vibration settings on my X Rocker chair?
The vibration settings on your X Rocker chair can be adjusted through the control panel. Use the knobs or buttons to increase or decrease the vibration intensity. Refer to our section on optimizing vibration settings for more details.
7. What should I do if my X Rocker chair won’t power on?
If your X Rocker chair won’t power on, check that it’s plugged into a working outlet and that all connections are secure. If the chair still doesn’t power on, consult the troubleshooting section of our guide for further steps.
8. How do I maintain and clean my X Rocker gaming chair?
Regularly clean your X Rocker gaming chair with a damp cloth and mild detergent. Avoid using harsh chemicals. Check for any loose connections or wear and tear periodically. Our maintenance tips section provides more detailed advice.
9. Can I connect my X Rocker chair to a TV directly?
Yes, you can connect your X Rocker chair directly to a TV using audio cables. Plug the cables into the TV’s audio output and the chair’s control panel. Detailed instructions are available in the “Connecting to Different Gaming Systems” section of our guide.
10. How do I improve the comfort of my X Rocker chair for long gaming sessions?
To enhance comfort during long gaming sessions, consider adding extra cushions or lumbar support. Adjust the chair to your ergonomic preferences and take regular breaks to prevent strain. Our advanced tips and tricks section offers more suggestions on optimizing comfort.